Showing posts with label anti-bacterial. Show all posts

Monday, November 19, 2012

Meatless Monday: Yummy Side Dishes

This super-yummy potato side dish recipe from Little Mommy, Big Appetite was recently shared here a couple of weeks ago, and I just had to try it. She has so many delicious recipes to choose from, but this one is already a new favorite in my home now. I changed it up just a bit according to the ingredients I already had at hand, but I'm sure any way you make something with the words roasted, cheese, and potato in the name, it will turn out good!

I also came up with a new way to enjoy Brussel sprouts (well, there are other similar recipes out there, but this is my version) that I really liked and will be sure to try again. I normally just roast them with a little olive oil and salt and pepper, but this time I steamed and sauteed them. My Meatless Monday last week really felt like a gourmet meal, and I was joined by one of my besties who ate every bite up with Lily and I.


Cheese and Onion Roasted Potato Stacks
(serves 4)

Ingredients:

2-3 medium-size potatos, Russet or Idaho are good
1 small onion, grated or finely diced
4 tbsp olive oil
1 tbsp parsley flake
1/2 tsp salt
1/2 tsp pepper
1/2 cup cream cheese
Grated cheddar cheese

Preheat oven to 425 degrees. Mix olive oil, onion, and seasonings in small bowl. Clean and peel potatoes, if desired, then slice width-wise as thinly as possible. Brush bottoms of muffin tin with a little olive oil (or you can use cooking spray). Place one slice of potato in 1 muffin tin cup, then drizzle a little of the onion-olive oil concoction on top. Next, place a dollop of cream cheese on top, just about 1 tsp in size. Repeat process until 4-5 potato slices are stacked up in each muffin tin cup, topping it off with a little of the olive oil mixture and no cream cheese.


Place on center rack in oven and bake for about 25 minutes. Remove tray from oven, and sprinkle grated cheese on top of each potato stack, plus a little extra parsley. Put back in oven, and broil for 5 minutes more, or until cheese is melted to your taste. Allow to cool for about 5 minutes before serving. Enjoy!


Brussel Sprouts with Toasted Almonds and Lemon
(serves 4-6)

Ingredients

1 lb Brussel sprouts, cleaned and trimmed
1/4 cup sliced almonds
3 tbsp butter or oil
3 tbsp lemon juice
Salt and pepper to taste

Cut Brussel sprouts into quarters, like in the picture below. Fill a large frying pan's bottom with water, just enough so that the bottom is covered and is only about 1 cm deep. Place sprouts in pan, cover, and cook on medium-low for about 5-7 minutes, or until tender.  Meanwhile, you can toast the almond slices on the "Medium" setting in your toaster oven, or on a baking tray in your oven at 350 degrees until lightly browned (about 5-7 minutes).


Drain sprouts, then melt butter in pan. Put sprouts back in and saute for about 3-5 minutes. Add in the lemon juice and almonds, plus salt and pepper to taste, and stir until well-covered. Serve right away and enjoy the delicate flavor combination. 

Mommy's and Lily's plates

Potato stack cut open

If these sides don't entice you, then I don't know what will! We ate it all up and nobody complained. The cream cheese was such a nice touch to the potato stacks, I can't wait to make these again. I had three servings of the Brussel sprouts! We also had some rice pilaf from a package of Near East brand sides. I normally avoid pre-packaged foods like that, but Near East is pretty all natural to my knowledge and doesn't contain anything artificial. 

Hopefully picky eaters in your household won't have any problem with these tasty sides. Even babies over 6 months can enjoy some of the potatoes mashed-up and some extra-mushy brussel sprouts. I hope your family likes these as much as we did :)

We all know brussel sprouts are super-good for us, but they are also one of those classic ick foods we all remember mom and dad forcing upon us as kids. I have actually always enjoyed them, probably because my mom would steam and butter them until they were like buttery mush in my mouth. Yet, most kids don't like them, but that shouldn't be. They are so yummy and versatile- you can steam them, roast them, bake them, add the to soups and stews, mash them up, chop them up...really, there is just so much you can do!

They are chock full of vitamins and nutrients like vitamin K, vitamin C, manganese, and folate. They support a healthy immune system, fight cancer-causing free radicals, and also support a healthy heart and digestive system. They are in season now, so remember to have them with Thanksgiving this year!

Now it's your turn to share your Meatless Monday dish below! Share your turkey-alternatives or other yummy Thanksgiving favorites. No rules, other than please only link-up meat-free recipes. No other un-related links or I will remove them. Sorry to sound so harsh, but let's keep it true to what it is, ok? Link up as much as you want, and feel free to spread the word with the button below. Thanks, and have a great week! 
          
Photobucket

Have a Happy Thanksgiving, everyone, and be safe wherever you are! Thanks for linking-up and supporting my blog, I greatly appreciate it ALWAYS. Btw, if you missed it Friday and are still looking for an alternative to a full-sized turkey for your main course this year, here is an easy and tasty turkey loaf recipe. I'll be away for the holidays, so I may not post again today after this, but I'll do my best if I can find the time. :)


Sunday, October 14, 2012

Meatless Monday: Apple Pancakes

Recently I came cross this clever idea involving pancake batter and sliced apples on Pinterest...read on...


Apple Pancakes
(makes about 12 pancakes)

2 apples of your choice
1 1/2 cups whole wheat flour
3 1/2 tsp salt
1/4 tsp all spice
1/4 tsp cinnamon
1/4 tsp nutmeg
1 tbsp honey
1 1/4 cup milk of your choice
1 egg
2 tbsp butter or oil (I used coconut oil)

Mix all dry ingredients together in one bowl, then all wet (except for oil or butter) in another; combine until batter is smooth. Core apples, and then slice width-wise at about 1/4" thick, or desired thickness. Heat oil or butter over medium-low heat in large frying pan (or use a griddle if you got one!). Dip each apple slice into batter with a toothpick, then place onto pan. Fry for about 2-3 minutes on each side. Serve topped with extra apple slices and maple syrup. (Here is a recipe for apple cider vinegar from the original post).


Super easy and super yummy! Lily and I loved them, and I'm sure your family will too :) Such a clever and simple way to make a fun, fall-themed breakfast anytime of the year. We used ginger gold the first time, and then honey crisp the second time and both ways were very good, although I prefer the sweetness of the honey crisps over the spicy ginger golds.

Now it's your turn to share your Meatless Monday dish below! No rules, other than please only link-up meat-free recipes. No other un-related links or I will remove them. Sorry to sound so harsh, but let's keep it true to what it is, ok? Link up as much as you want, and feel free to spread the word with the button below. Thanks, and have a great week! 
 

Sunday, October 7, 2012

Meatless Monday: Pan-seared Asparagus

Today I'm keeping it simple with this easy, yet dinner crowd-pleasing, side dish. Sometimes you just want something that tastes gourmet, even though it only took you a few minutes to prepare it. Search no further- this is it, and it can be done with other vegetables too.


Pan-seared Asparagus
(serves 6-8)

1 lb asparagus, trimmed and rinsed
1 tsp coarse salt
1 tsp coarse black pepper
1 tsp thyme
1 tbsp lemon juice
2 tbsp olive oil

Heat the olive oil in a large skillet over medium-low heat. Once heated sprinkle some of the salt and pepper over the oil, then place the asparagus spears on top. Sprinkle with the rest of the salt and pepper and thyme, then cover, cooking for about 5 minutes. Uncover and stir the spears around, allowing to cook on each side for a period of time until slightly blackened. During the last minute of cooking, toss the lemon juice in and stir the spears around once more. The object is to cook them well enough so that they are crisp, yet soft in the middle. Serve hot with extra seasoning if desired, with some rice and eggplant or other main course. Although this is Meatless Monday, I must add that this side dish goes excellent alongside steak.


Thyme is quite lovely with asparagus, and even better with the added lemon juice. It really brings out its flavor while subduing some of its sharpness. Thyme is full of vitamin K, antioxidants, and iron, as well as antimicrobials that have been used for years to help preserve foods. Fir this dish, you can use it fresh or dried, it will taste good either way. Although, its beneficial properties will be more preserved if used fresh.

Over the weekend we attended a young relative's birthday party, and I was pleased to see Lily pass over her pizza for raw veggies and ranch dip. This was especially good for her since- as you may have read in a previous post -she's been fighting a nasty cold for the past nearly week and a half. We even considered not taking her to the party, but she was having fun with the rest of the group bouncing around at Bounce U! All that's left of the cold now is a cough.

Choosing veggies over pizza

Affirming the values of healthy eating habits for children is a lesson that can last far into adulthood. It is so important for kids to eat healthy and balanced, and including fresh fruits and vegetables in the daily diet is a must. Variety is best, but sometimes there will be types of veggies that they just don't like, or won't even try, such as brussel sprouts. I believe it's important to never give up, and just keep trying new ways to serve it, and even when that doesn't seem to be working, give it a break then try again some other time. Taste buds grow and develop along with your child, and one day they may hate broccoli, then the next thing you know they're asking for seconds!

Now it's your turn to share your Meatless Monday dish below! No rules, other than please only link-up meat-free recipes. No other un-related links or I will remove them. Sorry to sound so harsh, but let's keep it true to what it is, ok? Link up as much as you want, and feel free to spread the word with the button below. Thanks, and have a great week! 

Photobucket

Sunday, March 25, 2012

Meatless Monday: Diablo Potato Salad

Today's Meatless Monday features a potato salad recipe with a twist from one of the Honorable Mentions from therecipe contest I just held. The combination of the mildly sweet Yukon Gold potatoes with a mix of spices give your otherwise classic potato salad a kick. Thanks to Ashley of Healthy Mom for Junk Food Kids!

Diablo Potato Salad

Ingredients
(serves a cook-out!)

3 pounds baby Yukon gold potatoes, halved
1 tablespoon Salt
1 tablespoon smoked sweet paprika
1/2 tablespoon White pepper
2 tablespoons Dijon mustard
2 tablespoons red wine vinegar
1/3 cup extra-virgin olive oil
1 tablespoon minced chives (or more- I used 3 tablespoons)

Boil the potato halves for about 20 minutes or until tender. When I made this, I couldn't find any baby Yukon Golds at the local supermarket, so I just used regular Yukons cut into halves, then quarters, then halved again. While potatoes are cooking, whisk together all other ingredients. Drain potatoes once they're ready then mix together in a large bowl with the sauce. Serve at room temperature with extra chives if desired.

about to be boiled

whisking...

Final outcome with added chives

This was quite delish! I am a big potato salad fan and this one immediately caught my eye while perusing Ashley's blog one day. I'm glad she submitted it for the contest and that I got to try it! I still have a lot left to eat with lunch for the rest of the week! Lily and Paul liked it too, and I will be book-marking this for future BBQs.

Paprika is such a fun spice I think. It’s sweet and slightly hot and really works well with mayo. I especially like to top egg salad off with a sprinkling of it. You may not know it, but paprika does more than add a spike of flavor to your food. It’s high in vitamin C and has anti-inflammatory, blood-regulating, antibiotic, and digestion-aiding properties. Paprika is also great on poultry and in rice dishes, such as this one that’s a favorite in my family.

For baby:

Mash-up a half or two of the boiled potato and mix it with a little olive oil. The olive oil is very good for developing babies :)

Kids should like this potato salad too; despite it’s name, it is not as firey as you might think, and actually just has a nice bite to it that’s more on the mild side for kids who don’t like spicy foods. My Lily never did seem to mind spiciness as long as it wasn’t mouth-burning hot!

So, this is me trying to get back on track with my blogging. Hopefully I will get back to my 3+ posts a week and then have a new up-and-coming blog of the month next month, as well as my weekly blog hops. If you have someone to nominate for blog-of-the-month, do it now! Preferably a blog with 200 followers or less that’s related to parenting, cooking, arts and crafts, health and/or well-being. Have a good week!

Saturday, November 12, 2011

November Cookies: Honey, Flax 'n Almond Cookies

Life is starting to get very full again (for example, I meant to post this yesterday, but didn’t seem to find the time). I recently took on a couple of new “big” projects for work, and since I work in retail, this just reminds me all the more that the holidays are upon us. I have most of my shopping done (kept it very minimal this year, only shopping for the little ones in my life at Etsy and local shops!) and baking recipes are brewing in my head daily. Hence, why I made this month “baking month” so I could test out new recipes and perfect older ones and make my final decisions on what to give as gifts this year. At this time, I’m thinking: Flax ‘n Coconut Chocolate Chip Cookies, White Chocolate Coconut Cookies, Vegan Sugar Cookies (for the friends and family in my life with allergies), Honey ‘n Flax Whole-wheat bread, and Banana bread. Is that too much coconut and flax? I figure, they’re healthy and tasty and I have been using them in cooking and baking a lot lately, so why not? What do you think?

The recipe I chose to share with you today could be a contender as well, although they cost a bit more to make since they use so much honey to make them sweet. They are AWESOME though! They have gone over really well with friends and family interested in healthy eating, although I will be honest and say that the sweet-tooths in my life thought they needed to be sweeter! If you try this recipe and want to sweeten it up more without sugar or more honey, I’d recommend adding about ½ cup chopped dates. I like them just the way they are, and I hope you will too! Once again I have adapted this recipe from my favorite magazine, Eating Well.

Honey, Flax ‘n Almond Cookies

1 cup whole-wheat flour
1 cup unbleached flour
¾ cup sliced almonds
¼ cup flax flour
2/3 cup + ¼ cup honey, divided
1/3 cup coconut oil
¼ cup whole flax seeds
1 tsp baking powder
½ tsp salt
4 tbsp unsalted butter at room temp
1 large egg
1 tsp vanilla extract
Extra flax seeds or sliced almonds for garnish (about ¼ cup combined)

Mix the flours, almonds, baking powder and salt together in a large bowl and set aside. Beat the 2/3 cup honey, oil and 3 tbsp of butter in a separate bowl until well combined. Add the egg and vanilla until well blended with the rest of the mixture, then combine the wet ingredients with the dry. Refrigerate the dough for 1 hour.

Preheat oven to 350 degrees. Coat cookie sheets with a little coconut oil or butter, (unless they are non-stick, which I don’t recommend due to carcinogens). Mix the rest of the butter and honey together until well combined. Roll dough into small balls (about 1 tbsp each) then line on cookie sheets about 2 inches apart. Press the back of a very shallow spoon (I use a tablespoon) or your thumb into the balls so it makes a shallow indentation, enough to fill with some of the honey-butter mixture. Spoon a small amount of the honey-butter mixture into each indentation. Top with a couple slices of almonds and/or a sprinkling of flax seeds. Place on center rack in oven and bake for 12-15 minutes, until golden brown. 

I think I could use some new baking sheets, what do you think?

Alternatively, you could fill the cookies with jam instead, or as well. That’s what I did when I first made these cookies and was experimenting with things as you can see.

With honey-butter, with honey-butter with flax seeds, and with blackberry jam

In the original recipe from Eating Well, it says to add the honey mixture after the cookies have baked. When I did this, the honey didn’t set right and got all runny. Putting the honey-butter mixture in before baking will help it set without getting too tough. The jam, however, may get a little tough, so you may want to wait for about 5 minutes into baking before you add jam to the cookies. I found that depending on the type of jam you use, it could come out a little rubbery and separate from the cookie when you bite into it. The less runny the jam, the less likely it will get rubbery.

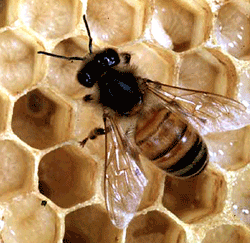
There is so much awesomeness in these cookies, I just love them! They’re healthy and taste really good, so healthy in fact that you could even eat them for breakfast without feeling guilty about it. One of the best things about these cookies is the amount of wonderfully rich and delicious honey in them, which I think is like the nectar of the Gods! I adore honeybees for so many reasons- they really are what make the world go around if you ask me. If it weren’t for honeybees, we’d have no one to pollinate the plants, and the world as we know it would completely change for the worse! You may have heard various things about the dwindling honeybee population and the reasons for it, such as pesticides, global warming, and even cell phone usage. I’m not here to talk about that plight today, as there is still so little concrete evidence for any single reason why the bees are disappearing (all I know about that is that it really stinks!). Instead, I’ll focus on the benefits of honey and hope that that will draw enough attention to how amazing bees really are. If you want to learn more about the disappearing bees, click here.


Honey is first and foremost incredibly healing when it comes to viruses and infections. Have a sore throat? Take a spoonful of honey and if it doesn’t go away in minutes, keep taking it once an hour until you feel better. Got a nasty cough? Try taking some buckwheat honey to beat the infection and sooth the chest pain. Weak immune system? Take a spoonful of honey everyday and you will boost it by at least 50%! So, skip the sugar in your tea and add honey instead, because as you’ll learn if you make these cookies, honey is probably the best sugar replacement available! Do note though that honey is sweeter than sugar, so use about 25% less when using it to replace sugar in recipes. Add more if desired. 

These are also ideal cookies to give your little one who is at least over 1 year old. Lily really likes them and I don't feel bad about giving her sweets this way! Infants under 1 should not eat any honey though because of Clostridium botulinum spores and toxins that can cause infant botulism, a life-threatening paralytic disease. Weird, right?  Before I had Lily I never thought honey ever posed any risk. It's okay to use products like Burt's Bees on infants though, just make sure they don't eat it! Older kids will love these cookies too, and you can use the dough as a base for a variety of healthier versions of cookie classics. 

Wednesday, September 7, 2011

For the Love of Basil


Italian Sausage Soup

½ lb of Italian style chicken sausage
4 cups chicken or vegetable broth
4 cups water
4 cloves garlic, sliced
1 cup baby or chopped spinach
1 cup corn
1 cup ditalini or other small-shaped pasta
1 red pepper, chopped
1 green pepper, chopped
1 small onion, chopped
¼ cup olive oil
¼ cup fresh basil + extra for topping
1 tbsp dried oregano
1 tsp red pepper flake or to taste
1 tsp salt
1 tsp black pepper
Grated Parmesan cheese for topping

Sautee the peppers, onion and garlic in the olive oil in a large pot with the oregano until fragrant. Add the broth and water and bring to a boil. Meanwhile, remove the casings from the sausage and break the meat up into chunks. Add the sausage meat, corn, pepper flake, salt, pepper and basil to the pot and stir. Simmer over medium low heat for up to an hour, tasting occasionally.

While that’s cooking, cook the ditalini separately until al dente. Drain when it’s ready and add to pot. Add the spinach after that and remove from heat. Stir until spinach is wilted. Serve with fresh basil and grated Parmesan and a little extra olive oil if desired. Great with pan-fried garlic bread.


I looove basil! I love the taste, I love the smell of it, I love how it looks, and I especially love how easy it is to grow! When my father-in-law gave Paul and I a bin full of fresh, organic tomatoes from the farm he works on, I instantly thought “homemade tomato sauce!” I started going through a check list in my head of what I had on hand and what I would need to buy. Olive oil- check, garlic- check, tomato paste- check, fresh basil- need to buy! You just can’t have freshly made pasta sauce without basil, and although you can use dried, I wouldn’t recommend it. Dried oregano if okay to use since fresh often tastes so strong, it overpowers other flavors in a recipe; but, with basil you really want to go fresh if you can.

It’s very simple to grow and doesn’t cost much if you decide to just buy it fresh at the store. Most supermarkets do carry it fresh and often potted in the produce aisle, as they did at Shop Rite when I went to get it for the sauce I made, and then I was able to add it to the soup. I will be sure to post the tomato sauce recipe in a future post as well! I made it in a slow cooker; so if you own one of those, do stay tuned!

Anyway, back to the basil…so, basil not only tastes and smells great, but it’s loaded- like many greens –with vitamin K. It also contains generous amounts of iron and calcium, but also anti-bacterial, anti-inflammatory and good for cardiovascular health. Basil oil is especially potent as an anti-bacterial, and is also pretty easy to make and a “fun” activity for a rainy day like today if you feel up to it. Adding just a small amount to pasta, salads, sauces, or use it as a dip- or however you want -will really add a flavorful kick as well as the added health benefits mentioned above. Some people even like the smell of basil so much, they use it as a body fragrance! Try a little oil of oregano or oregano extract mixed into a larger amount of orange or Clementine fragrance oil for an uplifting aroma.

Lily loves pasta, sausage, cheese and corn, so I just strained some from the soup and served it to her. She’s not too crazy about peppers yet, but the sausage did contain that flavor anyway, so hopefully she will get into it soon. If your child is ready for soup, they can have this yummy concoction as is and I’m sure they will enjoy being able to add cheese to it! For baby, you can mush up some of the corn and pasta with the cheese, and if they eating meat, add some of the sausage. The peppers are your call!

I hope you enjoy this soup, and with fall and winter drawing near, expect more recipes like this- I just love soup when it’s cold out ! :)


Monday, May 16, 2011

Red curry in a hurry


If you are new to Thai cuisine or have just never tried cooking it yourself, it can seem a little intimidating with the exotic ingredients and flavor combinations. To me, I think it’s actually quite simple and just like cooking anything else, in some ways even easier, so don’t be afraid! Curry is a classic in most Asian cultures, and Thai curry is very spicy, sweet and aromatic. You will fall in love! It’s also heavy enough for winter, but not so much that you can’t enjoy it during warmer seasons as well. The recipe I provided here is one of the easiest I know thanks to the magic of ready-made curry paste (I use Thai Kitchen).

Thai Red Coconut Curry

Ingredients:

1 14 oz package tofu drained and sliced into triangles*
1-2 tbsp red curry paste
1 cup chopped broccoli florets
1 cup chopped spinach
1 chopped avocado
1 red bell pepper seeded and sliced into strips
2 carrots peeled and sliced
1 14 oz can coconut milk
1 tbsp olive oil
1 tbsp lime
1 tbsp cornstarch
1 tsp turmeric
1 tsp blue agave syrup* or brown sugar (to taste)
2 tbsp chopped cilantro for topping

*Note: How to cut tofu into triangles: once drained, slice the block length-wise 3 times then in half width-wise. Then cut each half diagonally so you get 12 triangles altogether. Feel free to make smaller if desired.

Whisk the red curry paste, lime, turmeric, agave or brown sugar, coconut milk and cornstarch together in a bowl then set aside. Heat the oil in large skillet or wok then add tofu and cook until slightly browned. Add all the vegetables except for the avocado and cook stirring for about 3 minutes. Add the coconut curry sauce and bring it all to a boil, then add the avocado and simmer over medium heat until vegetables are tender. Serve sprinkled with the cilantro over brown rice. Sooo good!


You can also serve with lime wedges for an extra squirt of citrus, or over Asian-style noodles. A light salad with ginger dressing is a great starter with this as well. You can also get creative with the veggies, adding or subtracting things to your liking. Some other good additions are zucchini, bamboo shoots, bok choy and eggplant. You can also make it with meat or fish just the same as you did with the tofu, just add chunks of chicken, shrimp or white fish like tilapia.

I’ve never tried making my own curry paste, although I am sure it makes a HUGE difference taste-wise as making things fresh is always rewarding to your taste buds. If you are brave enough to try it and have a local Asian market near you that carries items like lemongrass and fish sauce (soy sauce can be substituted and keeps it in the “meat-free” realm), here’s a link from about.com.

Aside from tasting totally orgasmic (yes, I went there), the turmeric found in most curries is a leading anti-inflammatory and also helps to clean the liver. With the addition of coconut milk, you also get the added benefits of a boost to your immune system due its anti-bacterial properties. The blue agave syrup (that was also a suggested ingredient in my last post’s recipe) that can be used in place of brown sugar if available is a plant-derived sweetener from Mexico and is thought to be better for you than regular sugar, although there is a still a lot of controversy surrounding it (including the most likely possibility that all the “controversy” is merely coming from the sugar industry trying to drum up some trouble against their competition). It is about 25% sweeter than sugar, so use it accordingly in place of sugar, and is also anti-bacterial like the coconut milk and very good for the colon.

Curry is something that can be tricky at first, but then great to experiment with the balance of seasoning once you get the hang of it. 

When it comes to kids, though, curry may not be to their liking unless you make it pretty mild. Then they may enjoy it, especially kids 5 and up I would think. I haven't experimented with it for Lily yet, but she does have a taste for garlic and hummus, meaning, she's not completely shy to stronger-tasting foods. Like I've said before, it really comes down to what your typical diet is and knowing what your child already likes and dislikes. The fresh vegetables paired with rice or noodles and a little sauce are healthy enough. For toddlers, I'd suggest:

1/4-1/2 cup of whatever chopped veggies you use for the curry, steamed
1/4-1/2 cup rice or noodles

Top with soy sauce or sesame oil if desired.

Easy-peasy, right? (I can't believe I just typed"easy-peasy").

For baby:

3 tbsp pureed carrots or spinach

Mix with breastmilk or formula and some rice cereal.

Kŏr hâi jà-rern aa-hăan! (Thai for "enjoy your meal!")


Related Posts Plugin for WordPress, Blogger...