Showing posts with label flax. Show all posts

Friday, November 30, 2012

Sweet Saturday #29: Chocolate Chip Banana Bread Cookies with Flax

Thanksgiving has come and gone, and I am just getting back into the swing of things after returning from my travels to North Carolina (I hope none of you missed me too much!). I hope everyone had a nice one, too. I was visiting my mom’s side of the family in North Carolina. It was an especially momentous gathering since my grandmother intends to move out of her house- the house she has been living in for the last 35 years –by next spring. The very house where I, my sister, and our cousins spent many a fine summers exploring the woods out back, building dams in the creek, hiding in Grandpa’s garden, and enjoying Grandma’s homemade treats like cookies and pancakes every day of each visit. The very house where, each December, Grandma always had the biggest, nicest tree my young eyes had ever seen, and where we’d join her in the Love Feast Mass at her Moravian church on Christmas Eve, and, if we were lucky, we’d get to catch the Christmas light garden, too. The very house where my parents and then my sister got married in the backyard, where I learned the joys of outdoor trampolines, where I used to spend hours catching salamanders and snakes and crawfish and other creepy crawlers (those were my tomboy days!), and where I’d hoped my little Lily would get to spend at least a few good years experiencing the splendors her Great Granny’s home had to offer.

It was a bittersweet visit…mostly sweet, though :)

Source

We had the whole family there for the first time in years; there is usually at least one of us who can’t make it at the same time as everyone else, but this year, somehow we managed to do it. My eldest cousin’s wife recently gave birth to her first child, a sweet baby boy named Declan. My sister has another on the way, plus a toddler who thinks the world of Lily. We ate lots of good food, played Scrabble and Scattergories together, watched a few good flicks, and enjoyed the surprisingly warm and sunny weather.

I didn’t get to make anything for Thanksgiving since we got there a bit later than planned and I had other things to do, but I did bring along these yummy Chocolate Chip Banana Bread Cookies and they must’ve been a hit because they all got eaten up :)


Chocolate Chip Banana Bread Cookies with Flax
(makes 2 ½ dozen)

Ingredients:

2 ½ cups whole wheat flour
1 cup butter
1 cup honey
2 ripe bananas, mashed
2 cups dark chocolate chips
2 eggs
1 tsp baking soda
1 tsp salt
¼ cup ground flax seeds
1 tsp vanilla extract
2-3 tbsp flax seeds
1 tsp honey + 1 tbsp water

Preheat oven to 375 degrees. Combine flour, baking soda, salt, and ground flax in bowl. In a separate bowl, combine butter and honey, then beat in banana, eggs and vanilla. Slowly stir dry ingredients into bowl of wet. Once well-mixed, add in the chocolate chips.

On ungreased baking sheets, drop spoonfuls of cookie dough at about one inch apart. Place sheets on center rack in oven and bake for 10-12 minutes, or until nicely browned on top. While cookies are in oven, mix the 1 tsp of honey with 1 tbsp water in a small bowl. During last 2 minutes of baking, brush the tops of the cookies lightly with a little of the water and honey mixture, then sprinkle on flax seeds. Put sheets back into oven and continue baking. 


These cookies are nice and moist and don’t taste “too healthy” at all. In fact, you could probably even add a cup of rolled oats to the dough to pump up their grain content even more. Mmm…that sounds really good, actually.

Soft and sweet and full of banana, flax, honey, and whole grain goodness, you won’t feel bad about treating yourself or you family with these cookies!

And now for our most-clicked Thanksgiving-themed features!

Appetizer/Centerpiece

Sherry from Jazzy Gourmet shared this incredible bread dough cornucopia. Just look at it! She even has a how-to video on her blog for your viewing pleasure. This is something I really want to try next year. Thanks so much, Sherry!


Main Course
 Mary from Mary's Kitchen always shares wonderful posts with us. For Thanksgiving, she linked-up two recipes for some yummy turkeys and everyone checked that out! Thanks, Mary!

Dessert!

Good Girl Gone Green hits the bullseye on the awesome meter once again with this vegan version of green tea hot chocolate. Perfect pick-me-up for those chilly winter afternoons. Thanks, Stephanie!
Our most-clicked overall were:
 

Thanks to everyone who linked up, and welcome new linkers! Grab a button below if you were featured!

Photobucket


Now on to the party!

Just follow these simple rules:

This weekend's guest hostess is Tammy from Our Neck of the Woods. She has one awesome blog full of yummy recipes, beautiful photos, and tales about her switch from city-living to country-living life. Check her out, follow her, and show her some love! Her linky will not be live until Saturday, but she's still hosting!


1. Link up something sweet to really WOW us all- your blog, Etsy store, Pinterest, Facebook, whatever you want! 
2. Link-up as much as you want and please follow me and Tammy at Our Neck of the Woods if you are not already. Leave me a comment if you are a new follower so I can follow you back!
3. Don't forget to hop around and say hi!
4. Share my button to get more people to join us (not required, but it would be nice!)


Healthy Mommy, Healthy Baby

Now that November is ending, it is officially Christmas time! (and I'm sure many of you have already started early). I intend to post at least 1 holiday-themed post each week, along with the weekly Meatless Monday Recipe Hop and Sweet Saturday Link Party. Let's hope I can keep it together and stick to that schedule!

Thanks for stopping by, this little get together really makes the weekend even more enjoyable for me, and gives me the encouragement to keep my little blog going :) 


Friday, November 9, 2012

Sweet Saturday #27: Apple Pie Smoothie

First we had Hurricane Sandy, and now Athena the Nor'easter snow storm! NY/NJ can't get a break! The funniest thing is, today it feels like 60 degrees out and the snow is almost completely melted! Less than 2 days ago it was pouring down on us and causing closings and delays. Those who believe that global warming is bunk are probably having second thoughts right now...

Anyway, let's talk sweet stuff instead. I keep seeing all these yummy recipes for variations on the apple smoothie, and decided it was time I made one myself. Using ingredients I had handy, here is what I came up with, and it turned out really good!


Apple Pie Smoothie
(serves 2 large or 4 small)

Ingredients:

1 apple, cored and chopped up (I used Red Delicious)
1 banana
1 cup milk of choice (I used almond-coconut)
1/2 cup plain yogurt
1 tsp flax powder
1 tsp vanilla extract
1/4 tsp cinnamon + extra for topping

Puree all ingredients in blender. Pour into glass(es). Sprinkle extra cinnamon on top and garnish with apple slice if desired.

What you'll need, plus ground flax seed
Everything about to get blended up!

Alternatively, you could just use vanilla yogurt instead of plain, and don't bother to add the extract. You could also easily substitute the apple for pumpkin and make it a pumpkin pie smoothie! Ooo...I know what I'm trying next..!

 
This is a new favorite for sure. A treat your entire family will love. Apples are so good for you, they're full of so many nutrients like vitamin C, fiber, antioxidants, healthy sugars, and so much more. We are all familiar with the old saying: "an apple a day, keeps the doctor away"- it's probably true! They're so versatile and easy to cook/bake/create with!
Make a batch of this smoothie for visiting guests that you don't have time to bake for!


Now, as I said before, Hurricane Sandy totally knocked me off my A game for a bit (and also knocked out my internet for about a week!), so forgive me if I didn't get to thank you for joining our last Sweet Saturday, or if I responded very tardily. I do my best to visit every link posted, but sometimes work and being a mommy/homemaker catches up with me, and my time runs out. I don't know how people who get over 200 links posted to their blog hop parties manage to get through it all! I wonder if they even do...?


And although I didn't make time this week to arrange for a guest hostess, I did check to see whose links had the most visits, in continuance with our fall theme. Here they are!


Earning My Cape's scrumptious-looking Pumpkin Roll recipe was our most-clicked overall! I think you can see why! Thanks, Susie!


Wow, just wow. Look at that slice of pie! Jazzy Gourmet's Chocolate Pumpkin Mousse Pie looks too good to be true! Thanks, Sherry!


Yet another delicious pumpkin-inspired recipe took third place in most-visited links. Jen's Favorite Cookies' recipe inspired my Pumpkin S'mores Cookies from 2 weeks ago, and now she is sharing these tasty looking no-bake treats. Thanks, Jen!

Most clicked-on honorable mentions:

Rich Chocolate Cake from Something Sweet

I'm doing something a little different and placing my featured button right on the post instead of emailing it, so grab a button if you were featured today!
 
Photobucket

Thanks to everyone who joined last time! Welcome all new party-goers! I can't wait to finally go through all the links from our last party and get a closer look- everything looks really amazing! Now, on to the party!


Just follow these simple rules:


1. Link up something sweet to really WOW us all- your blog, Etsy store, Pinterest, Facebook, whatever you want! 
2. Link-up as much as you want and please follow me and if you are not already. Leave me a comment if you are a new follower so I can follow you back!
3. Don't forget to hop around and say hi!
4. Share my button to get more people to join us (not required, but it would be nice!)

Healthy Mommy, Healthy Baby

Thanks for stopping by, this little get together really makes the weekend even more enjoyable for me, and gives me the encouragement to keep my little blog going :) 
 

Friday, October 19, 2012

Sweet Saturday #25: Nutty Peanut Butter-Banana Cookies

It's officially baking season in my house now! Our oven hadn't been working since we moved in to the new house, and Paul finally got around to tinkering with it, and somehow got it to work. Hooray! So, I got started on making some cookies, and here's a new one I came up with. It's so tasty, moist, and healthy you could even have them for breakfast!


Nutty Peanut Butter-Banana Cookies
(makes about 30 cookies)

Ingredients:

1 1/2 cups whole wheat flour
1 tsp salt
1 tsp baking soda
1 cup honey + a little extra for topping
3/4 cup coconut oil, softened (you can also use shortening or butter)
1 egg
1 ripe banana, mashed
1/2 cup peanut butter
3/4 cup cut oats
1/4 cup hemp seed
1/4 cup flax seed
1 cup walnut pieces
1/4 cup brown sugar or honey

Preheat oven to 375. Mix the flour, salt, and baking soda together in a bowl until combined. In a separate bowl combine the honey, coconut oil, and egg together; then mix in the banana and peanut butter. Slowly incorporate the flour mixture into the wet ingredients with an electric beater until well-mixed. Last, add the oats, hemp seeds, and flax seeds. 


On ungreased baking sheets, place small spoonfulls of the batter onto the sheet, at about an inch apart. Place into center rack in oven. While they're baking, heat the walnuts and brown sugar in a small pot over medium heat. When the brown sugar starts to melt, start mixing together with the walnuts, being careful not to burn. Continue until sugar is all melted and coating the walnuts, should take about 5 minutes. 


Spread candied walnuts over a sheet of parchment paper and allow to cool for a moment. At the 10 minute mark on baking the cookies, remove them from oven without turning off the heat, and carefully press the tops with the back of a spoon in order to make a shallow indent. Dab a little extra honey onto each indent, the place a few of the candied walnuts on top of each cookie. Bake for another 5 minutes, or until cookies are lightly browned. Allow to cool before serving.


This is a recipe I came up with on my own. I had an overly ripe banana I needed to do something with, and peanut butter goes pretty awesomely with banana, so I got creative. The added benefits of all the omegas, protein, fiber, and minerals from the nuts make these cookies especially healthy. Walnuts are especially beneficial for brain development and function, and those candied walnuts really make them yummy, so don't leave that out unless you want them to be completely sugar-free. Of course, you could probably make them candied with honey instead. Let me know how that goes if you try that!


I was happy to see that Lily really enjoyed these cookies. She loves treats, but- like most parents -I don't want her eating a lot of sugar. These cookies are the perfect fix for your little sweet tooth- whether it be your child, or yourself! We even had them for breakfast without feeling guilty about it ;) The only thing I would change next time is either add more banana or ease up on the nuts, because the banana flavor was a bit subtle. Other than that, this recipe is a keeper!

Now, here are the most clicked-on fall features:


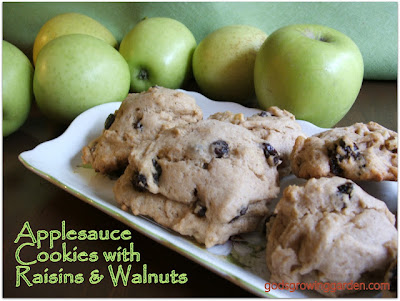
These tasty-looking cookies made with apple sauce, walnuts, and raisins are the perfect healthy treat to satisfy your fall sweets craving! Thank you, Angie from God's Growing Garden!


Holli from Full Hands, Full Heart had a wonderfully informative post about choosing allergy-friendly treats to give out to trick-or-treaters this year. I was especially glad she posted this since I often try to choose allergy-free treats myself! Thanks, Holli!


And we also have another adorable and creative costume from Carpe Diem who has lots of fun DIY Halloween costume ideas on her blog, so please check her out! I really liked this costume in particular because it was one of my first Halloween costumes when I was a little girl, and my mom made mine too! I'll have to dig-up a picture to share ;) Thanks, Ana!


And the most clicked-on features over all were:


Thanks, ladies! I can't wait to see what everyone links up this week!


Now on to the party!!!

Just follow these simple rules:


1. Link up something sweet to really WOW us all- your blog, Etsy store, Pinterest, Facebook, whatever you want! 
2. Link-up as much as you want and please follow me if you are not already. Leave me a comment if you are a new follower so I can follow you back!
3. Don't forget to hop around and say hi!
4. Share my button to get more people to join us (not required, but it would be nice!)

Healthy Mommy, Healthy Baby

Friday, September 21, 2012

Sweet Saturday #20: Raw Chocolate Banana Tart

For today's post, I'm sharing a really yummy recipe adapted from Good Girl Gone Green's blog. She always has such delicious recipes made with mostly (if not all) raw ingredients. You should definitely go check her out!

Anyway, when she linked this recipe up to Sweet Saturday last weekend, I just had to try it. I had most of the ingredients already, and what I didn't have, I improvised. I also had 2 ripe bananas needing to be used, so I tossed those in too. It came out phenomenal! The only thing I would do in the future is add some honey into the crust because I found it a little bland, but that's just me :) Other friends who tried it said they liked it just the way it was (yes, was, because this baby is gone!).


Raw Chocolate Banana Tart
(serves 8-12)

For crust:
1 cup nuts of your choice, such as almonds or pecans (I used a combination of almonds and cashews)
2 tbsp shelled hemp seeds
2 tbsp flax seed (I used some that were already ground)
1/2 cup coconut oil
1/3 cup shredded unsweetened coconut

For filling:
2 ripe bananas 
1/2 cup raw cacao or cocoa powder (I used cocoa)
1/4 cup honey, agave, or maple syrup 
1/4 cup coconut butter or oil (I used oil)

Note: If possible, soak nuts for up to 4 hours before using. I only soaked them for about half an hour, and everything turned out fine.  

Place nuts, coconut oil, and shredded coconut into food processor and blend until it is a fine crumble. Pour crumbs into a 8' or 10' pie pan and press into the bottom of the pan to form a layer, then place into freezer to set.


Looks like a beach...

Next, melt the coconut butter or oil if it is not melted already. You can keep things raw by melting it in a food dehydrator if you have one, or placing it in a small bowl in a larger bowl of warm water. Once melted, mix the ingredients for the filling together in the food processor, except for one of the bananas, until smooth.


Take the nutty crust out of the freezer, and spoon or pour chocolate banana mixture onto it, spreading it so that about an inch of the crust is still visible. Slice the reserved banana up and place slices on top of tart. Place in freezer until it sets, for about 1 hour (could very well take less, but an hour is for sure). Allow to defrost a bit before serving.


The one thing with placing the sliced banana on top is you have to keep the tart in the freezer once it's done, as to prevent them from getting all brown and gooey. If you'd rather keep it in the fridge so it doesn't take long to defrost (and easier to slice right away!), just don't put banana on top. It will still be beautiful and delicious!

Some other things you could use as toppings are:
  • sliced strawberries
  • blueberries
  • raspberries
  • sliced or crumbled nuts
  • shredded coconut
Just to name a few!

Eating raw helps to contain all natural enzymes present in food, which would be decreased or destroyed from cooking. These enzymes help our bodies to absorb the nutrients found in foods. Cooking food can also cause harmful compounds to form- especially if you burn or overcook something -that can be cancerous.  

In this day and age, it's difficult to go completely raw, but it's good to eat as much raw foods as possible, especially fruits, vegetables, and legumes. This tart will enable you to eat healthy and raw without having to lose the enjoyment of eating! Good Girl Gone Green has TONS of fantastic raw food recipes on her blog, as well as information about choosing a healthier raw lifestyle, so do take a look if you are curious about eating raw! 


OK- now it's time for the hop! Our guest-hostess today is April from April's Country Life Blog. She has the most adorable tea party treat recipes and other fun country-style tidbits. Please follow her and show her some love! 

I especially liked this fabulous cake she made for her daughter's birthday !

Just follow these simple rules:

1. Link up something sweet to really WOW us all- your blog, Etsy store, Pinterest, Facebook, whatever you want! 
2. Link-up as much as you want and please follow April's Country Life Blog and me if you are not already. Leave me a comment if you are a new follower so I can follow you back!
3. Hop around and say hi. 
4. Share my button to get more people to join us (not required, but it would be nice!)

 
Photobucket
<a href="http://jessica-healthymommyhealthybaby.blogspot.com/" target="_blank"><img src="<


Photobucket" target="_blank">Photobucket

Friday, January 13, 2012

Banana Flax 'n Walnut Bread Machine Recipe

I love my bread machine! If you read my last post featuring a bread machine recipe, you already know why. They make things so convenient, and with one, anyone can be a baker! Here's a great new recipe for banana bread, yum! It can be made dairy-free as well, so it's perfect for those with allergies who enjoy fresh-baked bread.

Banana Flax 'n Walnut Bread 

Ingredients

1/2 cup warm water
1 tbsp butter or canola or coconut oil
3 tbsp honey
1 egg
1/2 tsp vanilla extract
1 cup whole wheat flour
1 cup unbleached flour
1/4 cup ground flax flour
1 very ripe banana, mashed or sliced
1/2 tsp cinnamon
1/2 tsp salt
1 1/2 tsp dry yeast
1/2 cup crushed walnuts
1/4 cup flax seeds

Bring all ingredients to room temperature, then place all except the walnuts and flax seeds in bread machine according to instructions (mine has me place the wet ingredients in first, with the yeast on the top). Set the loaf size to 1.5 lbs on the "Basic Bread" setting, with crust setting however you want it (I normally use "Medium"). Turn it on, then add in the walnuts and flax seeds at the appropriate time if your machine has you add them in later in the cycle, and remember to remove the kneading blade before it starts to bake so you don't get a broken loaf. If you prefer, take the dough out after the kneading cycle has finished and mold it into a desired shape, then stick it in the oven for about 30 minutes at 400 degrees. After about 4 1/2 hours using the bread machine, you'll have fresh baked bread! 

Be sure to use a ripe banana!

Banana bread has always been a favorite of mine. My mom makes it from scratch by hand, and I have many fond memories enjoying it with some butter or peanut butter spread on top. Few things in life are better than warm banana bread.

I can't think of any kid who doesn't like banana bread either- it's sweet and healthy with the honey and whole wheat flour, too! And you know how much I love flax! Making bread with a bread machine is a perfect way to get your kids to help out without making much of a mess. It's simple to just measure the ingredients together then one-by-one place them in the machine together. Plus, what kid doesn't like pressing buttons? Lily loves fresh baked bread :)

Helping me scrape the sides of the bread pan, taken last summer


Tuesday, January 3, 2012

Bread Machine Delights for the New Year

First of all, HAPPY NEW YEAR! Can you believe it's 2012 and the world didn't end? I feel pretty good about this year, and I know a lot of other people who do too, how bout you?? I rang it in right with a fun group at church accompanied by my husband, daughter and mother-in-law, singing and dancing and playing music until past 2 in the morning! Can you believe Lily stayed up all that time? She refused to sleep and wanted to party with us too! What a trooper- she didn't even get cranky! We obviously slept in late that day...what did you do on NYE?

As I was saying most of last month, I've been busy, but for NYE weekend I took a break and just relaxed for the most part, simply enjoying the company of my family and being cozy at home. Winter has finally stepped up to the plate with weather in the 20s, so I am back to baking. Last month I focused on cookies, so this month I'll focus on something healthier with fresh baked breads! Yummmmmm.

Christmas 2010 Paul got me a bread machine and it has become one of my most used kitchen appliances. Once you go fresh-baked, you'll never go back to store-bought breads, and when using a bread machine, even the least oven-inclined people can easily make just about type of bread imaginable.

The bread I make the most is a simple wholewheat and flax I came up with by just trying different grains and seeds and using honey in place of sugar. I gave loaves of it as gifts to my family members and everyone loved it! I hope you enjoy it too :)

Jessica's Wholewheat Bread Machine Loaf

Ingredients (for a 1.5 lb loaf):

1 1/4 cup room temp water
2 tbsp butter or margarine
1 tbsp sunflower oil
1 1/2 tsp salt
3 tbsp honey
2 tbsp dried skim milk powder
3 cups wholewheat flour
1/4 cup ground flax flour
1 1/2 tsp active dry yeast
1/4 cup mixed grains and seeds: rolled oats, flax, sunflower, crushed walnuts

Bring all ingredients to room temperature, then place in bread machine according to your machine's instructions; mine has me place the wet ingredients in first, and the yeast in last in an indent I make in the flour on top. Select the "1.5 lb loaf" setting and "Wholewheat" setting (if applicable), as well as whatever style of crust you prefer (I usually use medium). Then press start and let the machine do it's magic. Add the oats and seeds at the appropriate time if your machine has you add them in later in the cycle, and remember to remove the kneading blade before it starts to bake so you don't get a broken loaf. If you prefer, take the dough out after the kneading cycle has finished and mold it into a desired shape, then stick it in the oven for about 30 minutes at 400 degrees. 

After about 4 1/2 hours using the bread machine, you'll have fresh baked bread! 

I did not have an image of one of my whole wheat breads handy, so here is a pic of how it could look via running-foodie.com

Investing in a bread machine is a really great idea; it will cut down costs to your grocery list, you will enjoy getting creative with it, and your house will smell like warm bread! Paul loves to come home to bread baking in the machine or oven- it smells just as great either way! Lily loves it too, and when you make bread yourself, you will guarantee preservative-free and filler-free bread. This is the best bread to make toast and sandwiches for your children with. Children benefit from eating whole grains in many ways, including receiving protection from developing diabetes, having more energy, and receiving weight-control assistance. Here is a link to some studies done on this wonder food, and here is a post I did in the past with some more information on the benefits of eating whole grains.

Image courtesy nutritionexpert.com

Using honey in place of sugar for most recipes does not effect the texture of the bread either; you can also add a honey glaze to the top of the loaf while it's baking by mixing a little honey in a little water then brushing it onto the top of the loaf about halfway through the baking period. Sprinkle some seeds on the top of it too if you like!

Do you already own a bread machine, and if so, how often do you use it? Do you just love it? What are some of your favorite recipes? Do share!

For the month of January, I'll post a different bread machine recipe each week on Friday (it just happens to be on a Wednesday this week). If you have a recipe to share, I might just decide to give it a try and post about it, so be sure to send me a link!


Related Posts Plugin for WordPress, Blogger...