Showing posts with label protein. Show all posts

Monday, October 29, 2012

Meatless Monday: Orange-Balsamic Roasted Beets and Carrots over Quinoa and Spinach

The storm's-a-comin' as I write this: the winds outside are picking up and the rain is just starting to come down. We are all ready with a stocked kitchen, extra filtered water, and plenty of candles at hand. We don't know just how bad Sandy's going to be, but we will be cozy :)

I was craving fresh vegetables after 3 days in a row of eating a less than stellar intake. Turkey loaf with Rice-a-Roni one night, carnival fare at the pumpkin patch for lunch on Saturday, then lasagna with tiramisu for dessert- I needed vegetarian pronto! And beets were on my mind...I picked up a bunch at my last trip to the supermarket, and roasted them along with some carrots in a sweet and slightly sour marinade...


Orange-Balsamic Roasted Beets and Carrots
(serves 2-4)

Ingredients:

3-4 beets
4-6 carrots
1/4 cup balsamic vinegar
1/4 cup orange juice
1 tsp orange zest + extra
Salt and pepper to taste (optional)

Set oven to broil. Slice off tops and bottoms of beets, then peel with a peeler. Wrap in tin foil, and place on baking sheet, then into oven like in picture below. Broil for 45 minutes-1 hour, or until they are easily pierce-able by a fork.


Meanwhile, trim and peel carrots then cut into thirds and quarters, or however you'd like. Reserve them for the last 20 minutes of roasting; at the appropriate time, arrange them on tray beside beets.

Once ready, remove beets and carrots from oven and allow to cool. While they're cooling, heat balsamic vinegar and orange juice over low heat in small saucepan. Heat for about 5 minutes, or until the mixture thickens slightly. Slice beets up like an orange into sections, or however you prefer. Toss veggies in bowl and some salt and pepper to taste if desired.

We ate this served over quinoa and fresh baby spinach, along with some orange slices and extra orange juice squirted right onto it all. It was delicious and refreshing, just what I was craving. Paul and Lily enjoyed it as well. This is a great way to introduce these kinds of healthy foods to your family. The veggies are extra sweet with this marinade, and it all mixes well with the spinach and quinoa. I cooked 1 cup of quinoa according to the package, along with a tsp of olive oil. 

she likes her beets!

Balsamic vinegar is my most often-used salad dressing. I like to mix it with a little olive oil, and salt and pepper. Did you know this low-fat, low-cal condiment also contains some health benefits? It is high in antioxidants, aids the digestive system in breaking down proteins, and also helps to regulate blood sugar, making it especially beneficial for those with diabetes.

If you have little ones under a year old, serve some of the carrots and beets mashed up plain, or with a little orange juice if desired. This is truly a meal the entire family can enjoy, whether you partake in Meatless Mondays or not.   

Now it's your turn to share your Meatless Monday dish below! No rules, other than please only link-up meat-free recipes. No other un-related links or I will remove them. Sorry to sound so harsh, but let's keep it true to what it is, ok? Link up as much as you want, and feel free to spread the word with the button below. Thanks, and have a great week! 

Thursday, October 4, 2012

Comfort Soup Italian-style for the sick house + quick potty update


sicky girl

Since Sunday, Paul and Lily have had the sniffles and coughs. No serious fevers, they have just both been feeling all-around blah. Lily was actually well enough to go to school on Monday, but after I tried bringing her in on Tuesday, they called me and suggested I bring her home early. I rushed right over and scooped her up- stopping for princess stickers on the way, of course. Yesterday everyone was home and having a sick day, so I made this cozy and easy to make ravioli chicken soup from the "Nanny Rose Recipe Vault".


Ravioli Chicken Soup
(serves 8+)

Ingredients:

4 cups chicken broth
2 cups water
1 12 oz package of frozen, small-shaped raviolis
2 cups packed baby spinach
6 cloves garlic, minced
2 tbsp olive oil
1 tsp basil
1 tsp parsley
1 large egg
Salt and pepper to taste
Parmesan cheese (optional)

Cook ravioli in separate pot and set aside. Meanwhile, saute garlic in olive oil in large pot over medium-low heat for about 5 minutes. Next, add broth and water and bring to a boil. Add basil, parsley, salt and pepper to taste, then remove broth from heat. Crack egg over the broth and quickly mix in with beater so it breaks up into small bits and turns white. Add the spinach and stir in until wilted, then the raviolis last. Serve up in large, shallow soup bowls and stir in some grated or shredded Parmesan cheese if desired. If you have the sniffles, adding cheese is not the best idea, although some people just can't say no to extra cheese!

Ravioli in one pot, broth and seasoning in the other

And there you have it- the perfect comfort soup, I guarantee it! We ate it up so quickly I almost forgot to take a picture of it! It will fill your belly and warm your spirit.

Good to the last bite...
  
On a side note, I have backed off quite a bit on potty training Lily lately. After one too many fits and kicks and screams from her, I continue to offer it any chance I get, but the only person who she will willing sit on the pot for is her daddy right now! Unfortunately, he's at work most of the time, but when he's home, he can usually get her to sit on it at least a couple of times a day. She still hasn't made anything in it since those first few times, but here's hoping we'll have a breakthrough soon!

How are you doing with potty-training if you're in the process as well?

That reminds me- a few weeks ago, they had back-to-school night at Lily's daycare, and it made me feel better about the potty training thing when, a) the only thing any parent there had to ask the teacher about was potty training help, and b) the "potty hall of fame" wall was completely...


BARE!

Not really sure what to think about that...it really can be hard, huh? I know they have the kids sit on the pot at her school (there is not even a changing table in her classroom), but you'd think they'd learn faster in a group...I had actually been hoping they'd teach her so I didn't have to!

Another thing I wanted to mention in this post is that I am moving towards changing up the layout here. I'm kind of "over it", and my blog is about more than just eating healthy and recipes now, so I think the general look should reflect that. The name will be the same, of course, but I don't know how the rest will look. So stay tuned and don't be surprised if next time you visit, things look different!


Friday, September 14, 2012

Sweet Saturday #20: Quinoa Smoothie

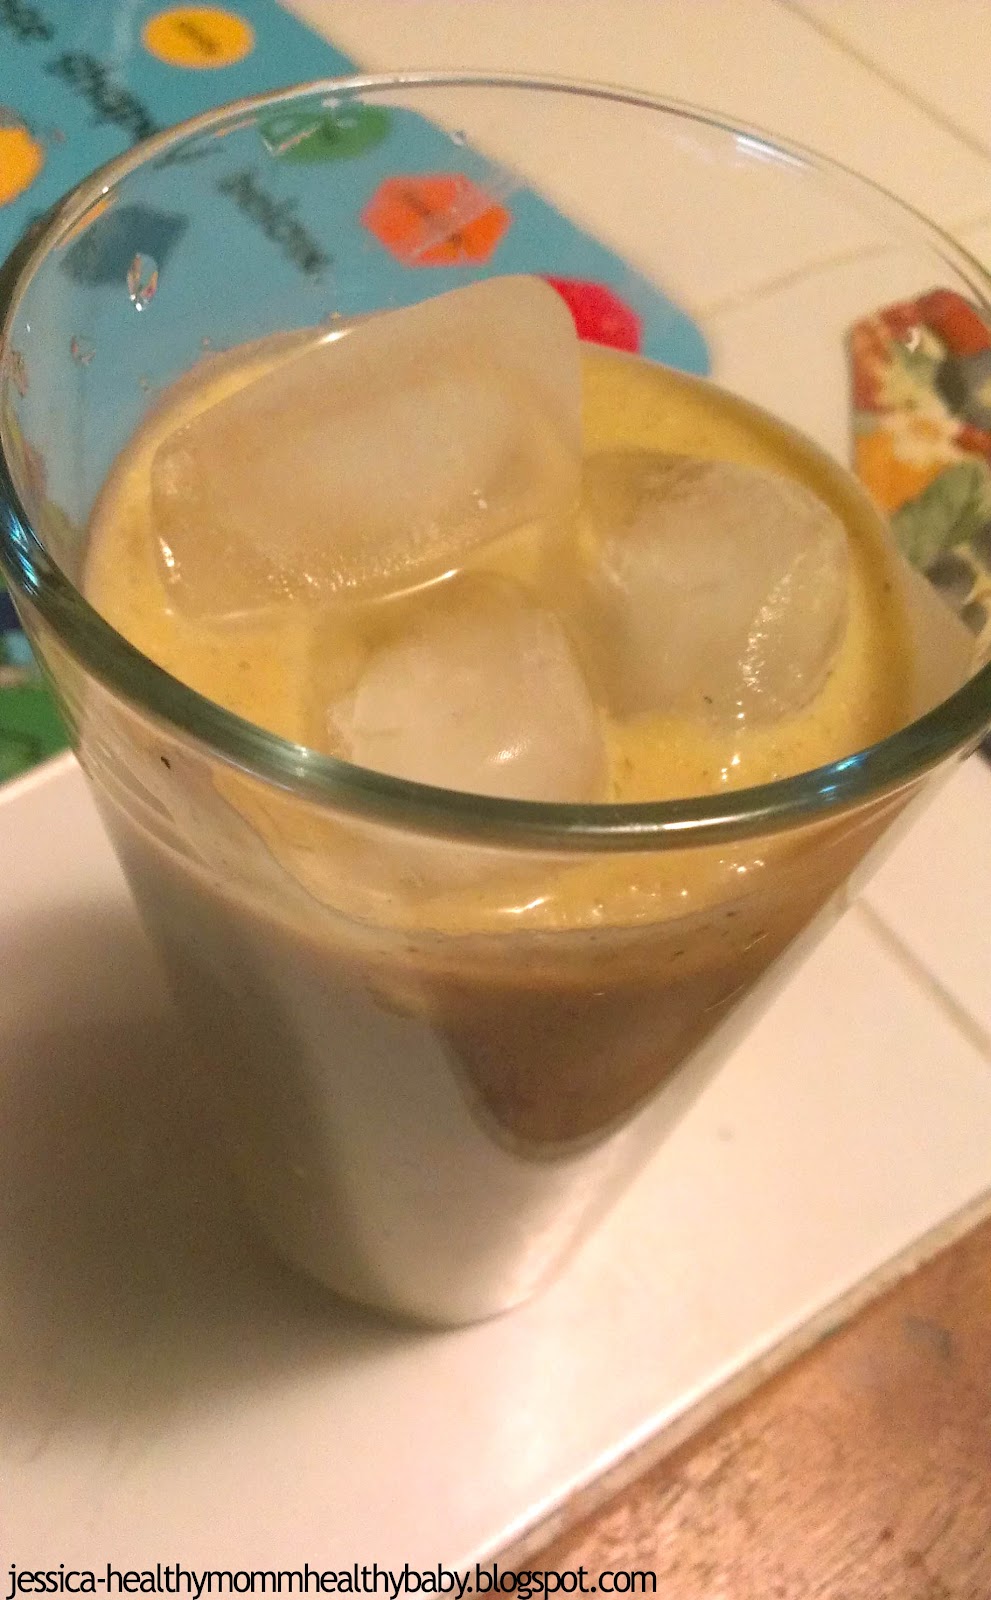
I got this idea for a protein-packed, super thick smoothie from the aptly-named, Green Thickies blog. I had heard about it being possible to make a smoothie using cooked quinoa, but after Katherine Natalia linked up her version onto Meatless Monday earlier this week, I decided it was high time I tried it!

I happened to have some recently purchased quinoa in my cupboard, along with other things that could easily be used to make a good-tasting and super healthy smoothie. No green stuff left (I had just made a big batch of kale pesto!), so this was all fruit, protein and omegas! The quinoa gave it a slightly nutty taste, but other than that, it tasted just fine!


Banana-Mango Quinoa Smoothie

1 cup cooked quinoa
1 banana
1 mango
1 cup coconut-almond milk, or milk or your choice
1 tbsp honey
1 tbsp shelled hemp seeds
Ice cubes (optional)

Cook the quinoa ahead of time according to package instructions; it is just like cooking rice. Toss all ingredients into blender and hit "Blend" or "Puree", depending on how smooth you want it. Pureeing will make it less "chunky", as the quinoa will create some minor lumps in the smoothie. I kind of liked that! Serve with ice is desired.


The smoothie came out so thick that the ice cubes rested right on top of it! I thought this helped to make it easier to drink, but if you like it extra thick, then this is the recipe for you! You can even blend the ice cubes right into it.

Other ingredients you can add:
  • vanilla extract
  • ground flax seed (this will give it an extra nutty taste)
  • soaked raw almonds and/or cashews
  • peanut butter (or other nut butter)
  • pineapple
  • peach
  • melon
  • spinach
  • just about anything that goes well in a smoothie!

Quinoa is considered a super food, and contains such a high amount of protein, it is called a "complete protein" since it contains all the amino acids needed to meet our nutritional needs. It is also high in other important nutrients, such as iron, calcium, copper, and manganese, to name a few. It is gluten-free and incredibly versatile to cook with, making it a great addition to soups, salads, breads, and even cookies!

This is a great smoothie for the whole family, perfect for enjoying with breakfast. It can easily replace your coffee with the amount of healthy carbs it contains to jump-start your day. Simply add whatever fruit you and your family enjoy most to make it work for you.

OK- now it's time for the hop! No guest-hostess today- sorry! I just didn't have time to organize that aspect this week. Just follow these simple rules:

1. Link up something sweet to really WOW us all- your blog, Etsy store, Pinterest, Facebook, whatever you want! 
2. Link-up as much as you want and please follow me if you are not already. Leave me a comment if you are a new follower so I can follow you back!
3. Hop around and say hi. 
4. Share my button to get more people to join us (not required, but it would be nice!)

Healthy Mommy, Healthy Baby

Thanks so much for linking up, I really do love Fridays even more because of this :)

Monday, July 9, 2012

Meatless Monday: Southwestern-style Corn Fritters

I hope nobody out there melted from the intense heat over the weekend. I know it left me swimming in sweat and utterly lacking motivation. I did, however, manage to make a new variation of my corn fritters using black beans and tomato which came out really good, and a perfect summer, poolside treat.

If you didn't catch the first post I did on corn fritters, click here. This time I happened to have a bag of a frozen veggie medley containing corn, red and green bell peppers, tomato, onion and black beans, which is why I decided to use it for this purpose. Although they came out yummy and all got eaten up by Paul, Lily and I, I still honestly think my original Zesty Corn Fritters recipe is my favorite fritter concoction so far. 

This version uses classic southwestern ingredients and scallions fresh from my garden. Yes, finally got my herb garden going thanks to Paul! We also have lots of lovely flowers sprouting up to as you can see...


Southwestern-style Corn Fritters
(makes about 1 dozen fritters)

Ingredients
(please note: I used a bag of frozen mixed veggies, but this recipe is written as if using the ingredients fresh) 

1 14 oz package frozen corn defrosted, or fresh corn from 3-4 ears
1 medium green bell pepper, diced
1 medium red bell pepper, diced
1 medium tomato, diced
1/2 cup cooked black beans
1/2 cup chopped scallion
4 cloves garlic, minced
1 lime, juiced
2 large eggs, slightly beaten
1 cup flour
1 tsp chili powder
1 tsp cumin
1/2 tsp baking powder
1/2 tsp salt
1/2 tsp pepper
1/2 cup water (plus extra if needed) 
Apprx. 1 cup oil for frying (canola, grapeseed or vegetable)

In a large bowl, mix flour, seasonings and baking powder together in bowl, then beat in the eggs, lime and water. Stir until smooth, then add all other ingredients except for the oil. If mixture looks too wet, add a little more flour; if it looks too dry, add a little more water. It should basically look like pancake batter with chunks of veggies in it. 

Heat oil in a large frying pan over medium-high heat. Once oil is hot enough (simmering and smoking, but not boiling), drop spoonfuls of the fritter batter into pan like in the picture below.

Fry for 2-3 minutes on each side, or until golden brown. Remove from pan with a spatula and set on paper toweled plate or cookie sheets. Allow to cool for at least 5 minutes before serving.


I made a little salad to go with them using these ingredients 

Mommy's and Daddy's

Lily's
  
YUM.

These tasty veggie cakes are full of vitamin C, B vitamins, fiber, iron and protein. Using a healthy oil like canola or grapeseed helps to keep carcinogens at bay. Pairing them with a fresh salad or soup makes a perfect light lunch or dinner. Kids will love them, too, guaranteed! They're also super easy to make and your little one can even help with put the ingredients into the bowl and mixing them.
 
This may surprise you, but scallions are actually good for you. I always used to think they were just a simple herb that gave a nice tangy onion flavor to many tasty dishes, but they also contain a fair amount of vitamin K, fiber, healthy fatty acids, and are even found to be anti-cancerous. They are easy to plant and grown, and cheap! In fact, after Paul planted them, we forgot about them until they suddenly popped up in our garden, blessing us with an abundance of zesty chive goodness.
 
Planting herbs is easy to do and to maintain. Most herbs don't need much tending, just enough sunlight and water. Plus, fresh herbs always taste way better than dried. The issue I've always had with buying fresh herbs at the supermarket is that I'm always forced to buy a huge bunch that I know I will never use up in time, and I never do, causing most of what I buy to go to waste. Luckily, we have now been blessed with plenty of land to grow a garden on, but if you don't have your own plot, an Aerogarden is a great way to grow your own plants in doors. You could probably also easily find DIY herb garden set-up instructions by doing a Google search, like this one.

Have a happy and healthy Meatless Monday!
 

Friday, June 1, 2012

Sweet Saturday #7: Sweet Product Review!

It’s been a busy week, and it looks like things will just be getting busier and busier for me. My new job is starting to really pick up, and by mid summer I expect us to be in full swing! I will keep you posted on this exciting new venture of mine as details develop. For now, we are in such “baby steps” mode that I feel I should keep mum on the word.

SO, finding time for trying fun new recipes has been hard. But, finding time to try fun new things hasn’t!

The Ben & Jerry’s Ice Cream is on sale at Shop Rite by us this week, so I picked up a couple of flavors since our ice cream maker broke (that was the main way we’d been enjoying ice cream for the past 2 years). I got Irish Mudslide which was good, but I also got a flavor of their new Greek Frozen Yogurt line- Banana Peanut Butter. And that was really good!  I didn’t really know what to expect, but you know Ben & Jerry’s rarely disappoints. It’s banana flavored Greek style frozen yogurt with swirls of rich peanut butter. Yummmmmyyyy. Add some hot fudge and fresh strawberries and you might think you’re eating a banana split!


It also has less fat than most B&J’s flavors (8 g per ¼ cup serving), but still has a lot of sugar per serving, at 26 g. One of the things I like most about B&J’s ice cream is that they have a dedicated pledge to not use milk from cows treated with rBGH. That makes me happy. It would make me even happier if thy also pledged to use organic and no corn syrup, but it’s still a step in the right direction. They are also very socially active regarding the green movement, Fair Trade, and even Occupy Wall Street.

You may not know this, but Greek style yogurt is considered to be even better for you than regular yogurt. It contains twice as much protein, has less sodium, is lower in carbs, and easier on the stomach digestion-wise. Greek yogurt is thicker and creamier than regular yogurt because the extra whey and water is removed, thus also making you feel fuller after eating it. Read more about the amazing benefits of Greek yogurt here at Livestrong.com.

Next time you see Ben & Jerry’s Greek Frozen Yogurt at the supermarket, don’t be afraid to give it a try! There are a lot of good flavors out!

Note: I was not paid or asked to write this review, I did it by my own accord. Do you know a great product I should review, or a product you’re curious about but afraid to try? Let me know in the comments! Just please suggest a natural, organic, eco-friendly, or health or food-related product so it will at least coincide with my blog’s theme, thanks! OR you can send me a product you'd like me to review for you, contact me at healthymommyhealthybaby@gmail.com for more details regarding that.

Now it’s your turn to share! This week’s guest hostess is Julie from Naptime Review. Please follow me if you have not done so already, and Naptime Review. Then link-up something sweet to share- a blog, an Etsy store, an FB page, Twitter page, Pinterest, whatever! Hop around and say hi. Grab a button to spread the word! Have a great weekend!


Photobucket
<a href="http://jessica-healthymommyhealthybaby.blogspot.com/" target="_blank"><img src="<Photobucket" target="_blank">PhotobucketPhotobucket />" alt="Healthy Mommy Healthy Baby" width="125" height="125" /></a>

We hope to go the beach this weekend, what are your plans?

At the Jersey Shore last summer. Waters aren't so blue there...

Thanks for stopping by! Have a great weekend!

Friday, March 9, 2012

Family Favorite Friday: Sloppy Joes


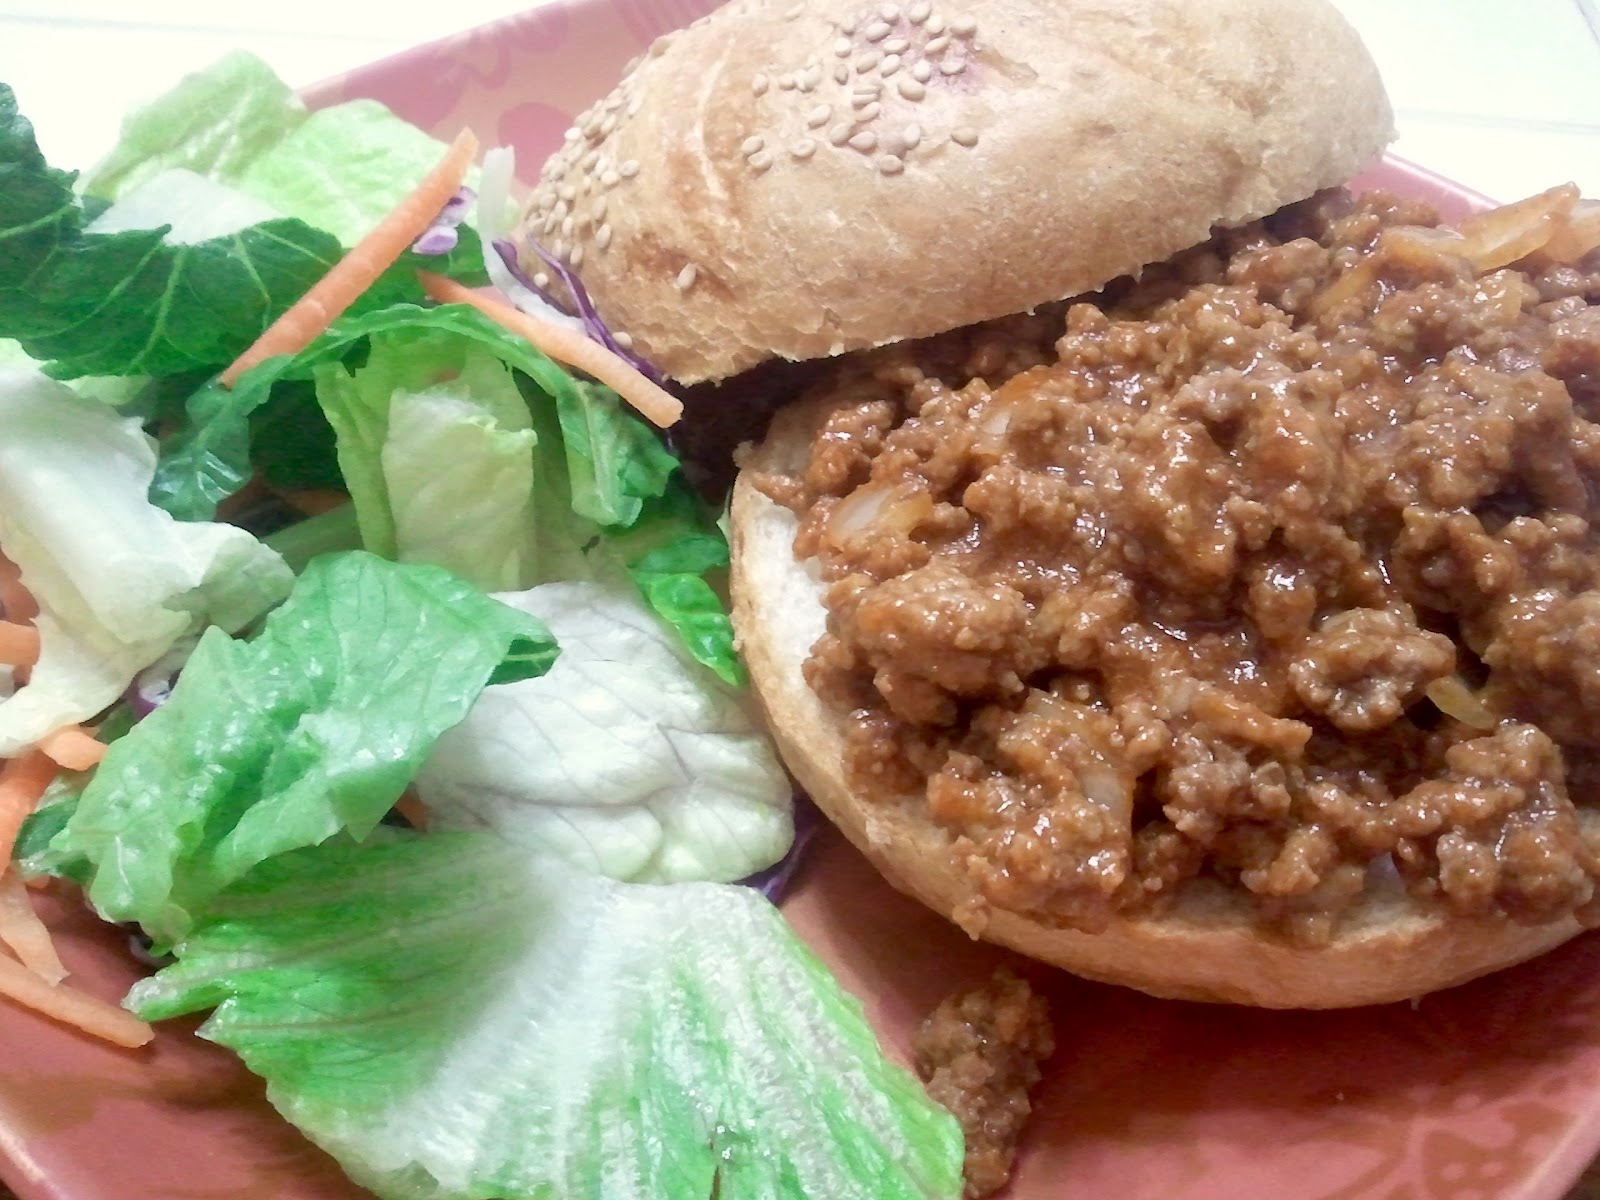
Yeah, I know. Sloppy Joes aren’t exactly healthy. My family doesn’t eat them very often. No, these babies are reserved for “special occasions.” Besides, I only eat red meat about once a month and when I do I want it to count! Using grass-fed, organic ground beef helps to make them healthier along with the use of whole wheat buns. I hope you like, it’s a very simple recipe, and it’s an American classic I’m sure everyone is familiar with.

Sloppy Joes

Ingredients

    1 pound ground beef
    1 medium onion, diced
    1 cup ketchup
    ¼ cup water
    2 tbsp brown sugar or 1 ½ tbsp agave syrup
    2 tsp Worcestershire sauce
    2 tsp mustard
    1 tbsp canola oil
    ½ tsp garlic powder
    ½ tsp onion powder
    ½ tsp salt
    4 hamburger buns, split

Saute the diced onion for about 5 minutes. Add the meat and brown in a wide pan over medium heat and then drain. Stir in remaining ingredients (except the buns!) and stir. Bring to a boil and then allow mixture to simmer at medium-low for about 20 more minutes or so. Serve over toasted burger buns with salad, mixed veggies, or French fries (you can bake them to cut back on the calories!).


 Lily loved this when she first had it. I had made them from scratch at Paul’s request one day, and after years of never really liking Sloppy Joes, I discovered that this recipe was quite tasty. I don’t know what kind I have been served in the past, but I know the sauce out of the can doesn’t taste this good! 

Lily's and Mommy's plates

Served with green beans and corn topped with her favorite topping- grated Parmesan cheese

Me likey

Although I greatly dislike the way animals are treated on factory farms, red meat once in a while can be very good for you. Making an effort to buy ones marked "grass-fed, pasture-raised, growth and antibiotic-free, organic" will greatly reduce your carbon footprint on the livestock raising parts of the world and will also be much better for you and the animals. Red meat is chock full of iron and B vitamins which provide you with healthy brain function, energy, and a balanced mood. Red meat is also very good for the heart and can help to prevent heart disease.

As I have mentioned in a previous post, when I was pregnant I got sudden cravings for red meat and my OBGYN told me this was because my body was lacking in iron due to Miss Lily sucking it all up. I have always been mildly anemic, so I was not surprised by this. Apparently, supplements were not enough to keep my body happy, and I had to take what was meant to be a break from vegetarianism and start eating red meat again. I have not been able to get back on the no-meat diet since, but I do limit my intake.

I had also meant to raise Lily vegetarian, and did for her first year. She didn’t try any meat until she was about 16 months old, and that was all Paul’s doing. I allowed it, just chicken and turkey at first, but then when she was 18 months old she caught a rare case of Bell’s Palsy which cannot be easily cured. It’s a virus that has to be “waited out” and the only things that supposedly help are massaging the affected area and taking vitamin B supplements. Well, I don’t know if the massaging did much, especially since it was near impossible to get Lily to stay still long enough for me to do it effectively, but shortly after she started recovering and I started giving her B complex chewable vitamins, the weakness the Palsy left in her right eye started to subside. Since then, she eats meat whenever we do.

It’s funny how life works like that, how you can plan and even anticipate for it to go one way, but something comes out of left field and completely changes that. I would like to go back to a stricter veggie diet eventually, but right now I am just going along with what my body tells me, and sometimes it wants to eat meat.

I don’t intend to post a Sweet Saturday post or link-up this weekend because I have so much going on (as always). We’re moving next weekend and Lily’s big party is this Sunday, and these things keep me busy! But, who knows, maybe I will find the time :) I do have something yummy lined up for the next Meatless Monday though, so do check back for that! I do intend to post something sweet next week though, as I will have plenty from Lily’s Mickey and Minnie party to fuel that!

Just a reminder, I’m holding a recipe contest in honor of my 1 year Blogiversary. Please send me your yummy, healthy, family-friendly recipes to healthymommyhealthybaby@gmail.com and be entered to win a 1 year subscription to Eating Well magazine and have your recipe featured here on HMHB! I can’t wait to see what you send me! Have a nice weekend!
Related Posts Plugin for WordPress, Blogger...